High protein chicken pot pie casserole is a practical way to turn classic comfort food into a balanced weeknight dinner, and this chicken pot ppie caserole is built for busy U.S. home cooks who need reliable, protein-focused meals. It uses simple grocery store ingredients and keeps the structure clear and filling.
This recipe works well for families, meal preppers, and anyone trying to increase protein without cooking multiple dishes. Everything bakes in one pan, which keeps cleanup manageable on weeknights. For more reliable weeknight meals like this, explore our dinner recipes collection built for busy home cooks.
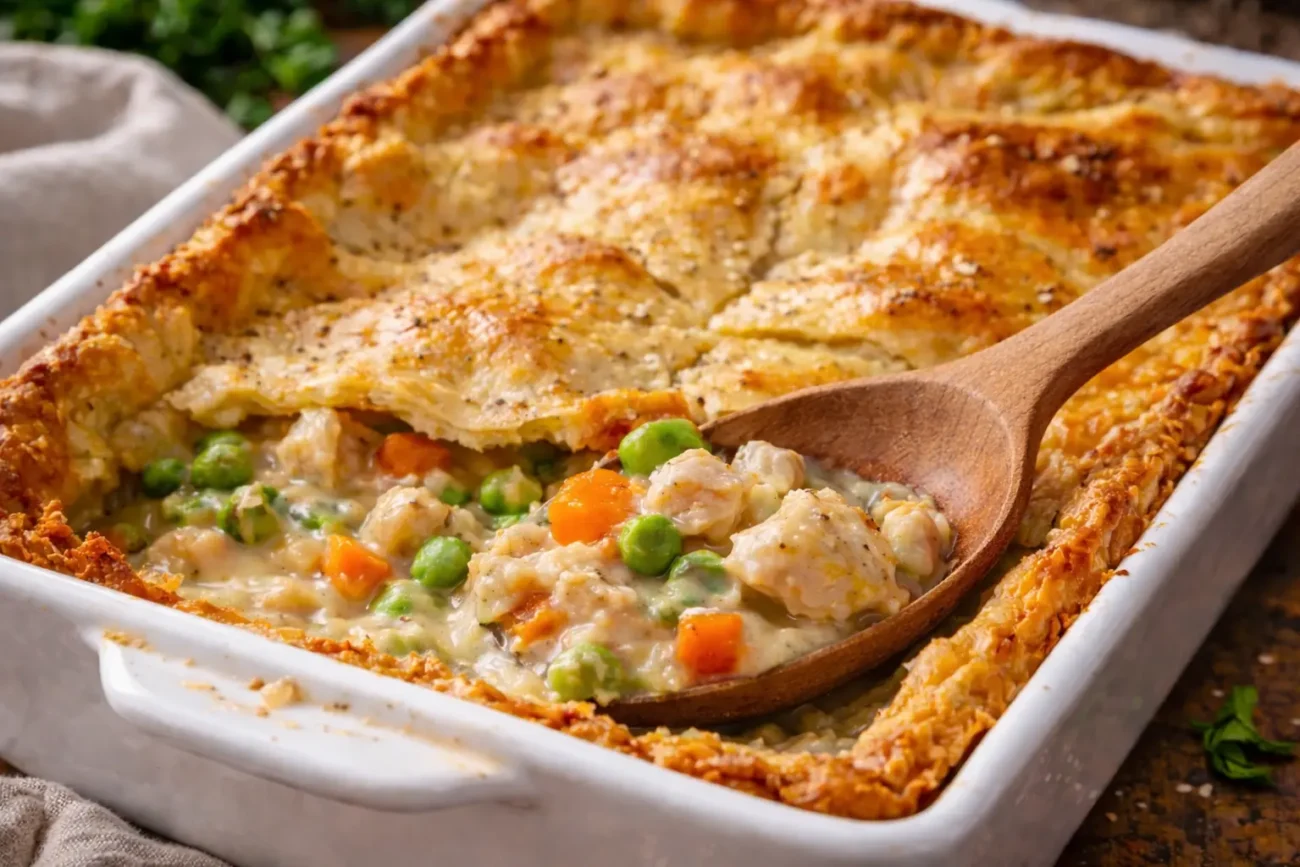
The filling stays creamy but not watery. At the same time, the chicken provides steady protein in each serving. The biscuit-style topping adds structure without overwhelming the dish.
If you want a dependable high protein chicken dinner that feels complete in one scoop, this casserole fits into regular rotation without extra effort. And if you enjoy structured one-pan chicken meals, creamy tuscan chicken follows a similar balanced approach with a rich but controlled sauce.
Food Safety Advisory: Cook chicken to an internal temperature of 165°F (74°C). Refrigerate leftovers within 2 hours and store in airtight containers.
For official U.S. safe handling guidance, refer to: USDA Food Safety and Inspection Service .
Time Breakdown
| Time Breakdown | |
|---|---|
| Prep Time | 20 minutes |
| Cook Time | 30 minutes |
| Total Time | 50 minutes |
What Is Chicken Pot Pie Casserole
Chicken pot pie casserole is a baked dish that combines diced chicken, mixed vegetables, and a thick savory sauce in a casserole dish. Instead of a traditional pie crust, it uses a biscuit or dough-style topping that bakes directly over the filling.
The texture stays creamy underneath while the top becomes golden and slightly crisp. Because the chicken is fully cooked before baking, the final dish holds moisture well and avoids dryness.
As a high-protein meal, this casserole works because the chicken forms the main structure. The vegetables add fiber and balance, while the sauce binds everything together without making it heavy. The topping acts as a lid, sealing in moisture during baking. Another high-protein chicken dinner that builds flavor first, high protein garlic parmesan chicken keeps the structure firm while staying weeknight-friendly.
Ingredients
This chicken pot ppie caserole keeps the ingredient list simple and protein-centered. It uses cooked chicken as the base, supported by vegetables and a controlled amount of sauce.
- 3 cups cooked chicken breast, diced (about 1 1/2 pounds raw)
- 2 tablespoons butter
- 1/2 cup yellow onion, finely chopped
- 1/2 cup celery, diced
- 1/2 cup carrots, diced
- 1/3 cup all-purpose flour
- 2 cups low-sodium chicken broth
- 1 cup whole milk
- 1 teaspoon salt
- 1/2 teaspoon black pepper
- 1/2 teaspoon dried thyme
- 1 cup frozen peas
- 1 refrigerated biscuit dough (8-count can)
If you prefer skillet-based comfort meals, creamy garlic chicken delivers similar richness without a biscuit topping.
Step-by-Step Instructions
1. Preheat the Oven
Preheat your oven to 375°F. Place the oven rack in the center position so heat circulates evenly. Lightly grease a 9×13-inch casserole dish with butter or nonstick spray. The surface should look lightly coated but not greasy.
This ensures the filling does not stick and makes cleanup easier later.
2. Sauté the Vegetables
Place a large skillet over medium heat. Add the butter and let it melt completely. Once melted, add the chopped onion, celery, and carrots.
Cook for 5–6 minutes, stirring occasionally. The vegetables should soften and look slightly glossy. The onions will turn translucent. Do not let them brown, as browning changes the flavor base of the sauce.
If the vegetables begin to brown, lower the heat slightly.
3. Build the Sauce Base
Sprinkle the flour evenly over the softened vegetables. Stir continuously for about 1 minute. The mixture will look thick and slightly pasty. This step cooks out the raw flour taste.
Slowly pour in the chicken broth while stirring. Add it gradually so lumps do not form. Then pour in the milk. Continue stirring over medium heat.
After 3–4 minutes, the mixture should thicken and coat the back of a spoon. When you drag a spoon through the sauce, it should briefly leave a line before filling back in. That is the correct thickness before baking.
4. Add Chicken and Seasoning
Stir in the diced cooked chicken and frozen peas. Add the salt, pepper, and dried thyme.
The filling should look thick, creamy, and evenly combined. The chicken should be fully coated in sauce. Let the mixture simmer for 1–2 minutes so everything heats through.
If the mixture looks too loose, allow it to simmer one additional minute. It should not look watery before transferring to the baking dish.
5. Transfer to the Baking Dish
Pour the filling into the prepared casserole dish. Use a spatula to spread it evenly into the corners. The surface should look level and thick.
An even layer ensures the biscuit topping cooks evenly across the entire dish.
6. Add the Biscuit Topping
Open the biscuit dough and separate each biscuit. Place them evenly across the top of the filling.
Leave small gaps between each biscuit. This allows hot air to circulate and helps them cook through properly. The dough should rest directly on top of the filling without being pressed down.
7. Bake the Casserole
Place the dish in the preheated oven. Bake uncovered for 25–30 minutes.
The biscuits should turn golden brown on top. The filling should bubble gently around the edges. If the tops brown too quickly before the center is done, loosely cover the dish with foil during the final 5 minutes.
To check doneness, insert a knife into the center of a biscuit. It should come out clean with no raw dough inside.
8. Rest Before Serving
Remove the casserole from the oven and let it rest for 10 minutes. During this time, the filling will thicken slightly as it cools.
This resting period helps the casserole hold its shape when serving. If you scoop it immediately, the filling may appear loose.
Helpful Tip: If your sauce feels too thin before baking, it will stay thin after baking. Let it simmer longer on the stove until it clearly coats the spoon before transferring to the casserole dish.
Nutrition Information
| Nutrition Information (Approximate, Per Serving) | |
|---|---|
| Calories | 420 |
| Protein | 34g |
| Carbohydrates | 32g |
| Fat | 18g |
| Fiber | 3g |
| Sodium | 620mg |
Nutrition Disclaimer: Nutrition information is provided as an estimate only and can vary based on ingredient brands, portion size, substitutions, and preparation methods.
Recipe Overview
This chicken pot ppie caserole works because the protein is built first. Using cooked chicken breast ensures structure and prevents overcooking during baking. The flour-based sauce thickens before it goes into the oven, which prevents a watery center.
Moisture control is key. The sauce should coat the vegetables fully before baking. If it is too thin in the skillet, it will stay thin in the oven.
The biscuit topping creates a sealed layer that traps steam, which keeps the filling moist. At the same time, the top browns and forms contrast in texture. Because everything finishes in one dish, it stays efficient and manageable for weeknight cooking. For a lower-carb alternative that still focuses on protein and controlled moisture, keto bacon ranch chicken thighs use a similar layering technique without flour.
Recipe At a Glance
| Recipe At a Glance | |
|---|---|
| Servings | 6 |
| Skill Level | Beginner |
| Flavor Profile | Savory, creamy, balanced |
| Cooking Method | Oven-baked casserole |
| Make-Ahead Suitability | Yes (prep filling up to 1 day ahead) |
Servings and Pairing Options
This chicken pot ppie caserole serves 6 full portions. For larger families, you can stretch it to 8 smaller servings by pairing it with a simple side.
It pairs well with a basic green salad dressed lightly with vinaigrette. Steamed green beans or roasted broccoli also balance the richness of the filling. If serving for meal prep, portion it with a side of fresh fruit or a small side salad for added fiber. If you’re looking for a higher-protein option without a creamy base, stuffed sweet peppers provide a structured beef-centered dinner.
Helpful Tips and Variations
- For extra protein, you can increase the chicken to 4 cups without adjusting the sauce significantly. The texture will be thicker and more meat-focused.
- If you prefer lower carbohydrates, reduce the biscuit topping and space them farther apart. You can also use a high-protein biscuit mix.
- Rotisserie chicken works well for convenience. However, remove the skin to keep the sauce balanced and avoid excess grease.
- If you want more vegetables, add 1/2 cup chopped green beans or mushrooms. Cook them fully before adding the flour so excess moisture does not thin the sauce.
Storage and Make-Ahead Notes
Refrigerate leftovers within 2 hours of cooking. Store in airtight containers for up to 4 days.
To reheat, place a portion in the microwave until heated through. For best texture, reheat in a 350°F oven for 15–20 minutes to maintain biscuit structure.
You can freeze the filling without the biscuit topping for up to 2 months. Thaw overnight in the refrigerator, then add fresh biscuit dough before baking.
Final Thoughts
This high protein chicken pot pie casserole fits easily into regular weeknight cooking. It delivers structured protein, controlled moisture, and full-meal balance in one dish. Because it uses common ingredients and simple steps, it stays practical for long-term meal planning. If serving this casserole for a family dinner, finishing with biscoff cheesecake keeps dessert simple while balancing the savory meal.
Frequently Asked Questions
Yes. Use about 3 cups of diced rotisserie chicken. Remove the skin so the sauce stays creamy and not greasy. Add the chicken after the sauce thickens in the skillet so it stays tender.
Make sure the sauce thickens on the stove before it goes into the baking dish. It should coat the back of a spoon. Also, avoid adding extra liquid from cooked vegetables or thawed frozen veggies.
Yes. Cook the filling, cool it, and refrigerate it in the casserole dish (covered) for up to 1 day. Add fresh biscuit dough right before baking so the topping bakes up properly.
Loosely cover the casserole with foil for the last 5 minutes. This protects the tops while the centers finish cooking. A knife inserted into the center of a biscuit should come out clean.
Freeze the filling without the biscuit topping for best results. Thaw overnight in the fridge, then add fresh biscuits and bake. Freezing baked biscuits can make them dense after reheating.
General Disclaimer: The content published on bitesrecipes.com is provided for general informational purposes only. While recipes are tested and written with care, results may vary based on ingredients, equipment, and individual cooking conditions.
bitesrecipes.com does not guarantee specific outcomes and encourages readers to follow proper food handling, cooking, and storage practices.